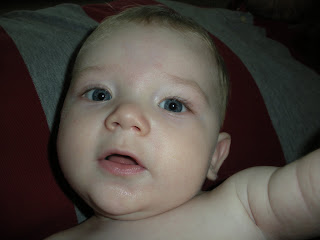
With Hayden loving his rice cereal, I decided that it's time to try some more foods. I'm SO excited to see how he likes them! Hopefully his system handles it well...or I could be in for quite a laundry experience. Gross.
ANYWAYS....I kind of made up my own recipe with only 5 steps. Here it is:
Organic Peas (I got a HUGE Costco sized bag of organic peas from one of Lesley's roomates when she was moving out. SCORE. For me, this recipe was completely free.)
You'll need:
- Frozen Peas
- COLD Water
- Blender (I used a magic bullet and it work SO well)
- Small pot (like the size that you would make Top Ramen in)
- Spoon to stir with
- Ice cube trays
- Strainer
1: Determine how much food you want to make. If you want a few weeks worth of food, use a cup or two of peas. If you want a couple days worth, use less. It's really not an exact science. Put your peas into the pot with enough water to wear you'll be able to cook your peas and not let them burn. I would say if you have an inch of peas in your pot, use half an inch of water. Just throw some in.
2: Heat to boiling on medium-high (stirring every once in a while). If your water evaporates before you get to boiling, throw a little more water in. Once you get to boiling, check your peas. If they are soft (and they should be), you're done cooking. If they are still hard, cook a little while longer. (ok, while I'm typing this, Hayden is on the floor with his whole right foot in his mouth just chewing away. Ha ha, so cute.)
3: Transfer peas to strainer to get rid of the hot water. Put your peas in your blender and add some COLD water. Add just enough water so that the blender doesn't have a hard time smashing your peas. You don't want your peas to be watery :-/ . Make sure that the water you use is COLD. This helps the pea skins to blend easier. Don't ask why. It just does.
4: BLEND. Blend the peas until they are smooth enough to where your baby will like it. Mine were pretty smooth because Hayden's not used to a lot of texture yet.
 |
| This is me trying to do an "artsy" close up to show texture while blurring the background. Unfortunately, macro on the point and shoot is just not cutting it anymore. Time to get a REAL camera! |
5: Pour into clean ice cube trays and freeze. When they are frozen, you can keep them in the trays or transfer them to Zip Loc bags labeled with the food and date. When you're ready to use one, just thaw it out in the microwave. Ta-daaaaaaaaaa :)
 |
| The frozen sticks of peas. The color is awesome. |
 |
| Too bad it looks nasty once you thaw it out.... |
 |
| Peas bagged, labeled, and ready to go into the freezer. They kind of look like celery sticks. |
 |
| Same with the carrots. The carrots were a little bit weird...even frozen, they were kind of watery and started melting instantly. |
 |
| Hayden's section of the freezer. At least it's organized! |
***NOTE ONE: I did the same thing with baby carrots, too. First I cut the carrots into thin strips and then everything was exactly the same. TRY IT!***
***NOTE TWO: Don't make a ton of food for the baby until you know that he/she likes it. I made ice trays worth of peas and it looks like Hayden might not like it too much. So...I hope he eats it and that I'm not stuck with a ton of frozen, pureed peas.***
I also had to take a few pictures of Hayden eating for Paul since he's at work. The videos are kind of funny...Hayden hated the peas at first because they have such a different texture. I stopped feeding him and then resumed about 3 minutes later and he handled it better. Still not sure what the verdict on peas is.
As you can see, he hated the peas so much that they made him gag! I think if I keep trying them on him, he might like them!


